A Look Into the Workshop
= Mandonator™ Serial #14 ===
This resonator mandolin was commissioned by Mary T.
The options she chose are:
- 5 strings with 14.295" scale
- East Indian rosewood body with curly maple binding
- Cutaway
- Round ebony-lined soundhole
- Khaya mahogany neck
- Snakehead head shape with East Indian rosewood veneer
- Honduras rosewood fingerboard with abalone position markers
- Orrico tailpiece
- Formby's satin tung-oil finish
Standard features include:
- Spherically arched back
- Nickel plated hardware
- Radiused fingerboard
- Spider bridge and resonator cone
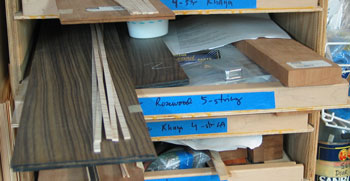
Here you see some of the parts for Mandonator™ 14 gathered together in its dedicated shelf drawer, most notably the wood for the body, sides, and neck.
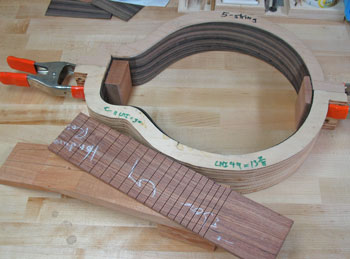
The neck blank, fingerboard and rim. The rim has just had the end blocks installed to join the two pieces of the sides together. It's held in a form to maintain shape at this stage.
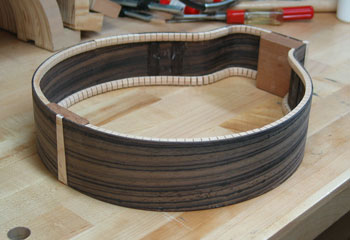
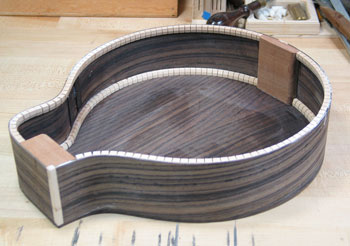
The rim is out of the holding form and you can see it now has lining along the edges and a wood wedge inlay on the tail. There's a wood inlay at the corner of the cutaway as well, but it's barely visible in this photo.
Here the two halves of the front are being joined. The wax paper isolates the clamp from any glue that might seep from the join.
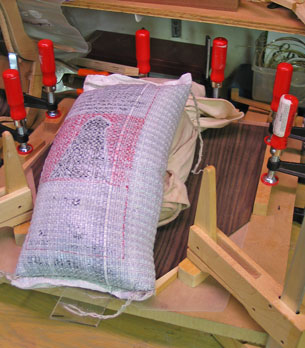
The two halves of the back being joined. The back pieces are on a "dished" form and are weighted with sacks of gunshot. Yes, gunshot; a small sack is quite heavy and molds to different shapes. The result will be a spherically arched back.
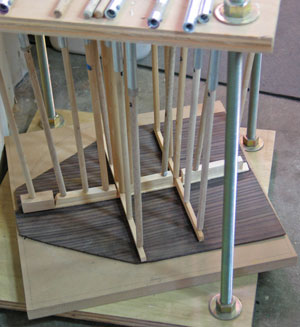
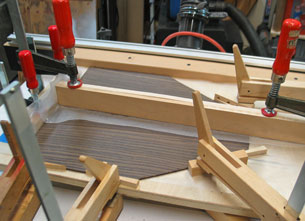
Once the glue has set on the joined back halves, braces are installed using a go-bar deck, which clamps the braces to the back. The braces are arched to match the arch in the back and will help maintain the arch as well as strengthen the back.
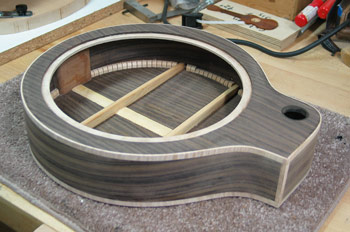
The top is attached to the rim and trimmed before cutting either the soundhole or the opening for the resonator cone.

After the opening for the resonator cone was cut, the sound hole was cut and lined with ebony. Then the back was attached and the top and back trimmed flush to the rim. The body still needs to have binding installed.
And here's the body with its curly maple binding.

In order to cut the mortise for the neck joint accurately, I designed a jig. Here you see the body of the Mandonator™ held in the jig, ready to have the mortise cut.
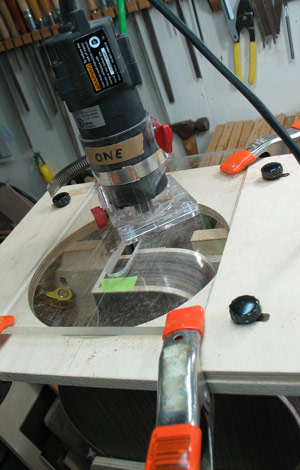
In this photo you can see the slot in the plexiglass that will act as a guide for the router while cutting the mortise.
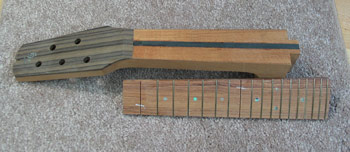
Neck and fingerboard, ready to be glued together. You can see the graphite truss rod in the center of the neck. I'll finish shaping and cleaning them after they're joined.
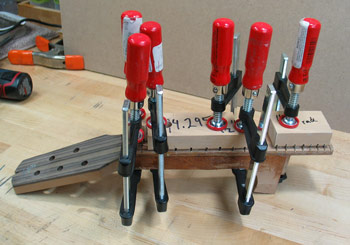
This is how the fingerboard is glued to the neck; it's clamped to the neck until the glue dries.
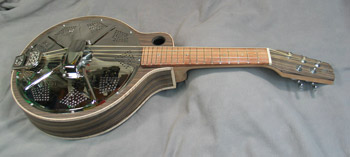
Almost done! Mandonator™ 14 is still "in the white," but has been strung and played. At this point, I make any minor adjustments to properly intonate the instrument. Then I'll apply the tung-oil finish that Mary requested.
Mandonator™ 14 has been completed! You can see photos of the finished instrument on its Gallery page.