A Look Into the Workshop
= Mandonator™ Serial #11 ===
This instrument was commissioned by Nashville fiddle star Megan B. Lynch Chowning.
The options she chose are:
- 5 strings with 14.295" scale
- Wenge body
- No cutaway
- Ebony fingerboard
- Abalone dot position markers
- Snakehead shape headstock with Ebony veneer
- Custom Fiddlestar logo inlay on headstock
- Ebony binding
- Maple saddle and black horn nut
- Black Gotoh 510 Mini tuners
- Black metal tailpiece and resonator coverplate
Standard features include:
- Spherically arched back
- Mahogany neck
- Radiused fingerboard
- Spider bridge and resonator cone
- Two traditional F-shaped soundholes
- Glossy lacquer finish
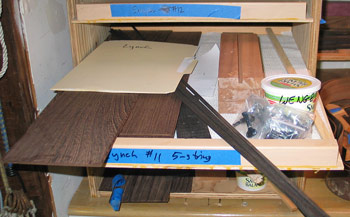
Parts for Mandonator™ 11 are gathered together in its dedicated shelf drawer: wenge body wood, neck and fingerboard blanks, binding, and tuners. The wenge has had a first-pass thicknessing. After final thicknessing, I'll bookmatch and join the front and back plates, then bend and join the sides.
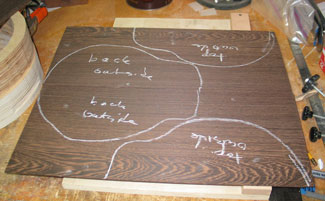
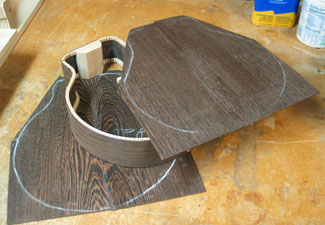
The two pieces for the back and front of the body will be bookmatched, and the outlines of the halves of each are drawn on the wood in preparation for cutting. Megan's preference is for very little figure in the wood, so the back has been laid out in the least figured part of the wood. The front has been laid out on the most highly figured part because only a little wood shows on the front of a Mandonator™ -- it's mostly coverplate.
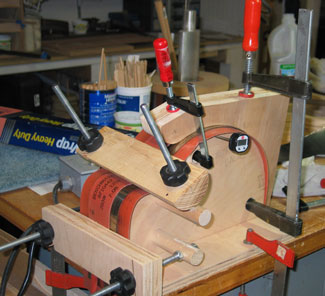
Here's one of the wenge side pieces on the bending form jig. You can't really see the wenge; it's sandwiched between two heat blankets and a heat conducting strip of metal. The heat will break down the cells of the wood and allow it to assume a new curved shape.
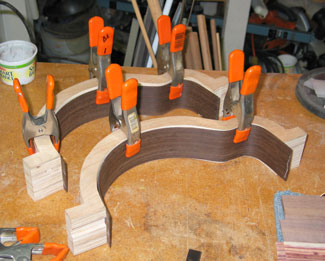
The wenge sides are fresh off the bending form. I've clamped each to another shape form to be sure they're protected and maintain their new shape until I'm ready to join the halves.
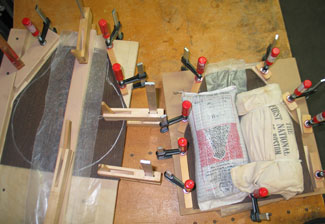
This photo shows the front (on left) and back halves being joined. The back pieces are on a "dished" form and are weighted with two sacks of gunshot. Yes, gunshot; a small sack is quite heavy and molds to different shapes. The result will be a spherically arched back. The wax paper isolates the clamps from any glue that might seep from the join..
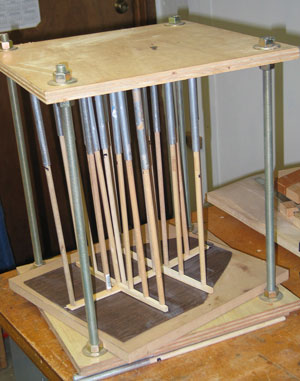
Next the back gets its braces installed; here it is in the go-bar deck, which clamps the braces to the back while the glue sets. The braces are arched to match the arch in the back and will help maintain the arch as well as strengthen the back.
The sides are being joined with end blocks. The sides are held in a form and the end blocks are clamped in place at each end. Wax paper separates the outside of the instrument body and the form to prevent any glue seepage from joining them together.
Top, sides, and back are nearly ready for assembly. Any residual glue will be cleaned up, and the raw edges of the rims sanded flat and clean before attaching the top and back.
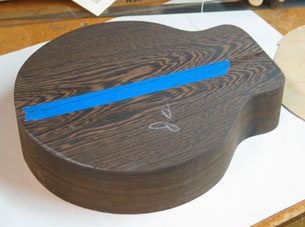
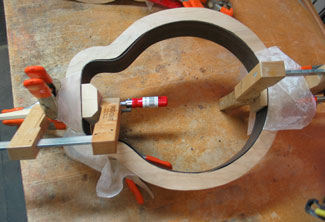
The top is attached and trimmed, and the next step is to cut the opening for the resonator. The blue tape provides alignment for a jig that I use to cut the opening.
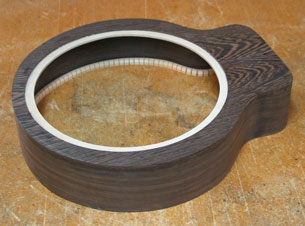
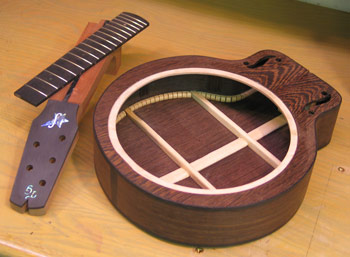
And here's the result. the white circle is a ledge where the edge of the resonator cone will sit.
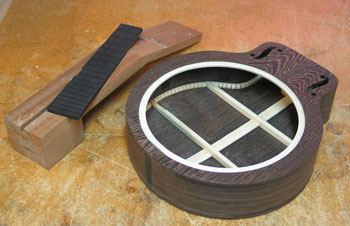
I always enjoy this stage of construction. The body is really starting to look like a Mandonator™! It still needs binding, and I'll start working on the neck and neck joint.
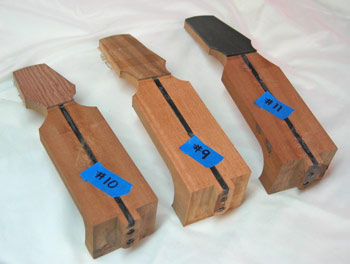
These are the necks, in progress, for instruments 9, 10, and 11. I've installed the graphite truss rods, created the tenons for the body joint, and attached the headstock veneers. The head and heel shapes have been roughed in. Meanwhile, I've been slotting the fretboards for these necks. Next in the process is to inlay the headstocks and fretboards. After that, I'll complete the fretboard shaping, install frets, and prepare to attach them to the necks.
If you look closely, you can see the ebony binding on the wenge body. I've done the inlay on the headstock, and the fingerboard is ready to install.
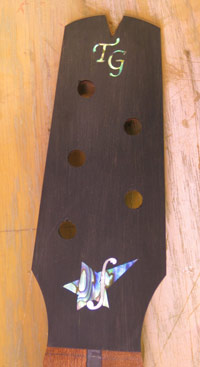
Here's a closer look at the abalone inlay on the headstock: my TG logo and Megan's FiddleStar logo.
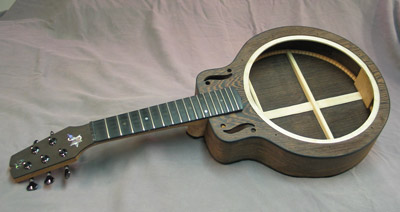
This is Megan's Mandonator™ in the "white." I've tried it with a coverplate and strings and it's got a lovely deep voice. It's now ready for a lacquer finish to be applied by Addam Stark. While it's off getting its finish, I'll "finish" the coverplate that it will have: one of my own design which I'll powder-coat black (for that "stealth" look).
Mandonator™ 11 has been completed! You can see photos of the finished instrument on its Gallery page.