A Look Into the Workshop
= Mandonator™ Serial #5 ===
This instrument was commissioned by multi-instrumentalist David Hansen.
The options he chose are:
- Four strings with standard 13.875" mandolin scale
- Mahogany back and sides with black ebony binding
- No cutaway
- Two round soundholes with ebony linings.
- Mahogany neck
- Ebony fingerboard
- Black ebony headstock veneer with abalone star inlay
- Abalone fingerboard position markers
- Banjo shaped head
- Nickel plated hardware
- Gold Star banjo tuners
- Resonator gutar-style stamped tailpiece
- Radiused fingerboard
Standard features include:
- Spherically arched back
- Spider bridge and resonator cone
- Maple saddle
- Bone nut
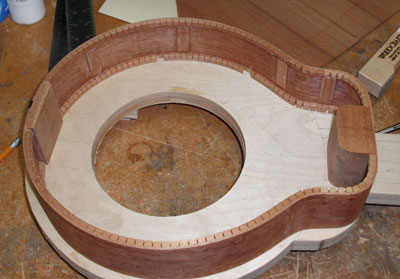
The sides have been bent and joined with the end blocks, and the lining and side braces are installed. The linings have been notched for the back braces. It's time to attach the top!
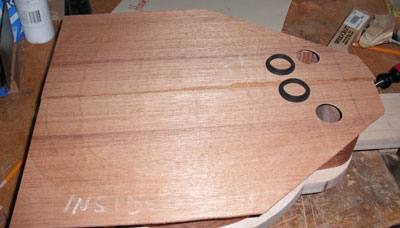
But the top is not yet ready to be attached. It's been joined, and is ready to have the soundhole rings glued in. Then the top joint needs to be cleaned up. The large hole for the cone is cut after the sides are glued to the top, to make sure the geometry is correct.
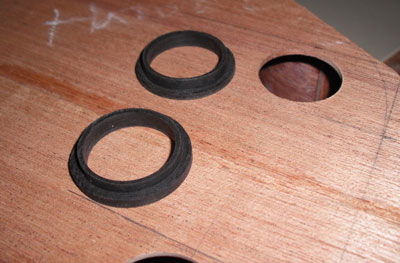
Here's a close-up of the flanged soundhole inserts I made. The flanged part goes under the top, and the lining is sanded flush to the top. The flange supports the delicate soundhole edge. I really like this design, and will try it again soon on the next Mandonator™ that I make for myself, I think.
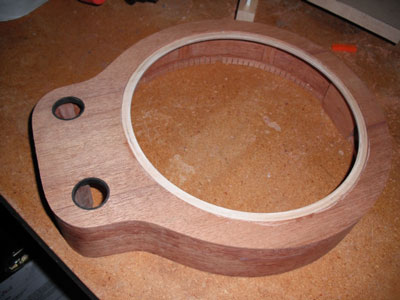
The rings are in and sanded flush. The top is attached to the rims. You can see the plywood ring that supports the edges of the resonator cone. What you can't see is the plywood brace under the top to support the area between the ring and the neck block.
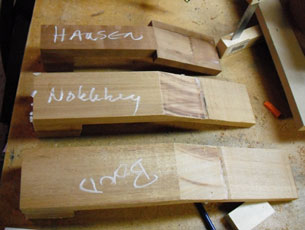
Here are the three neck blanks I'm going to be working on again soon. I'll work on them sequentially. Pretty obvious which is which. Each person wanted a very different version of the neck, so I need to treat them separately in order not to confuse myself.
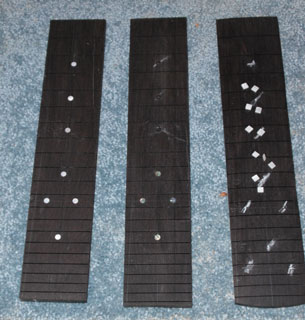
And here are the fingerboards. Left, Nokleberg (white MoP dots); middle, Hansen (abalone dots); right, Bond white MoP squares). There are three inlays missing from David Hansen's fingerboard. I must place an order for those dots right away! Hah! I thought I had enough. The chalk scores on Alan Bond's fingerboard are to remind me where to drill. Since the inlays are square, I will have to figure out what size drill to use, then chisel away the points of the squares.
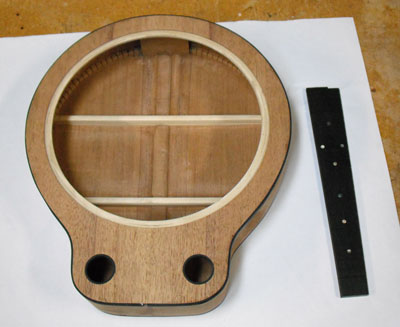
01/19/10. The back has been attached and the binding ledges cut and ebony binding installed. The fingerboard is ready for frets. I really like how the round soundholes came out, and will use them on my next personal instrument, I think!
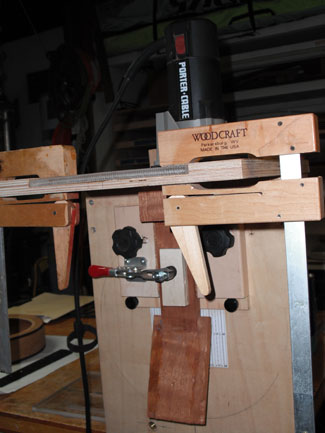
This is the router jig I made for cutting the tenon in the end of the neck. You can see the neck blank clamped in position.
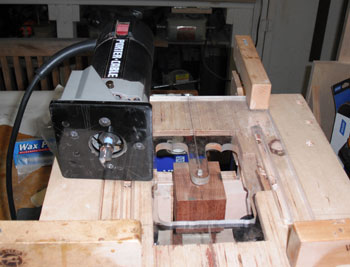
This is another view of the same jig, showing the heel where the tenon will be cut, and the router I'll use for the job. The plexiglass template outlines the tenon, and the router bit follows the shape. This has to be right the first time, and so I've set it up and left it, while I go do something else. When I come back, I'll double check to make sure I have it all set up right. I am always refining setups like this, and I already know a couple of things I'll change when I rebuild this jig. Meanwhile, with care, it works very well!
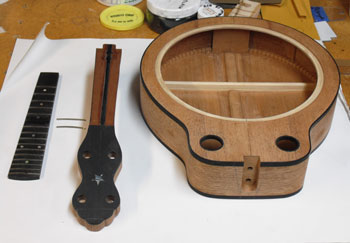
3/5/10. The parts are starting to look like a Mandonator™. The fingerboard has most of its frets, though the ends are just cut off, and the tops are not yet leveled, crowned, or polished. The body and neck joint is complete. It's about now that I start getting impatient to hear how it's going to sound!
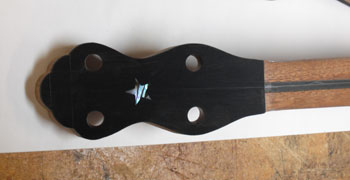
3/5/10. A close-up of the head inlay and shape. David wanted a single abalone star inlaid in the center of a banjo-shaped headstock, so that's what he got. This instrument is designed to use banjo tuners, too.
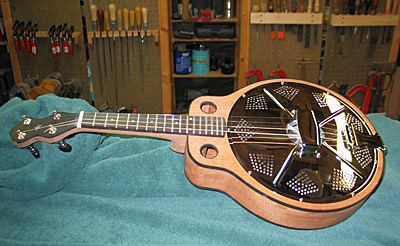
4/5/10. A very exciting stage – strung and playable, though still "in the white" (no finish on the wood yet). David came by for a neck fitting. He was happy with the neck as is, and remarked on the lovely tone – it's quite mellow and rich, and still as loud as ever. He said the instrument was "exactly what he had imagined!" Just a few final adjustments, then I'll place it in the capable hands of Addam Stark for a gloss lacquer finish.
Mandonator™ 5 has been completed! You can see photos of the finished instrument on its Gallery page.