A Look Into the Workshop
= Mandonator™ Serial #9 ===
After two years of steadily playing my prototype Mandonator™ #2, I decided to upgrade, and began this instrument. Work on it progressed slowly since customer orders took precedence. Then I sold Mandonator™ #2 to John Reischman and I was left without a Mandonator™ to play! Well, OK, I do have a "Frankenstein" instrument, meant to be a test bed for experimenting with features, so I've been playing it, but that's just not the same. A fire has been lit, as the saying goes, and #9 is coming right along.
The optional features are:
- Five strings with scale 14.295"
- Monkeypod body with rosewood binding
- One F-shaped soundhole
- African ebony fingerboard
- Multi-colored mother-of-pearl Japanese maple inlays on head and fingerboard
- Snakehead shaped headstock and African ebony veneer
- Gotoh 510 Mini tuners; James tailpiece
Standard features include:
- Spherically arched back
- Mahogany neck
- Radiused fingerboard
- Spider bridge and resonator cone
- Cutaway
- Maple saddle and amber buffalo horn nut
- Glossy lacquer finish
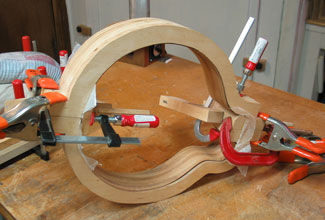
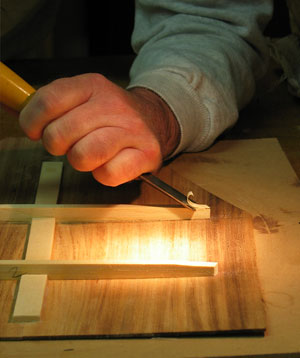
The sides are joined using end blocks. Here the sides are held in a form and the end blocks are clamped in place at each end. Wax paper separates the outside of the instrument body and the form to prevent any glue seepage from joining them together.
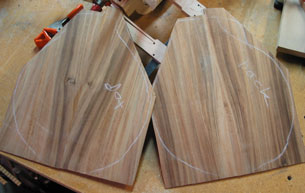
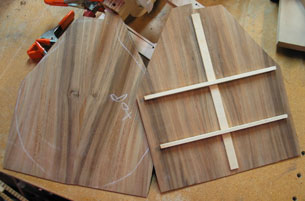
The bookmatched and joined halves of the front (left piece in photos) and back have beautiful figure. The photo on right shows the bracing on the inside of the back.
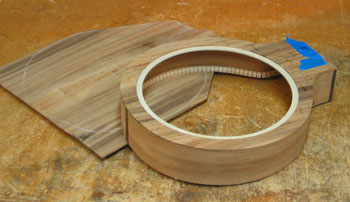
With the top and sides attached, the opening for the resonator cut, and its ledge installed, the next steps are to cut the soundhole and attach the back.
Before attaching the back, I shape the ends of the braces. This should allow the back to vibrate more freely, producing a nicer tone.
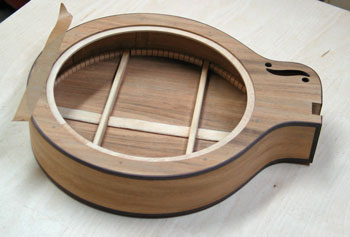
The body is complete, with soundhole and binding, and ready for the neck to be attached.
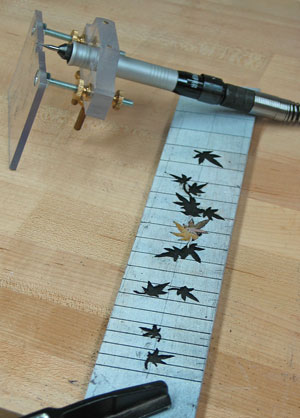
Inlay of the Japanese maple leaves is in progress. The fingerboard was coated with white, the outline of the leaves traced on it, then pockets were routed for each leaf. In this photo, two of the leaves are sitting in place, ready to be glued, and the remaining pockets are ready for the inlays. The slots have been cut for frets, but the frets won't be installed until after the inlay has been completed.
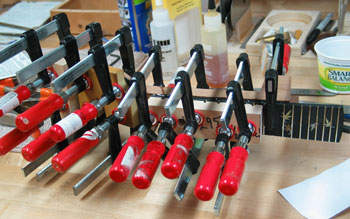
The fingerboard and headstock veneer are being glued to the neck. On the right, you can see that the inlay has been completed, and the frets have been installed.
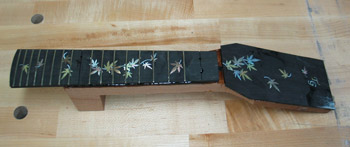
Here's the neck fresh out of the glueing jig. It's looking quite pretty, even before being cleaned up. The two locations with missing frets were used to position the fingerboard and the frets will be added later. And no, that's not the final shape of the headstock; the snake head shape can be cut now that the veneer is on the headstock.
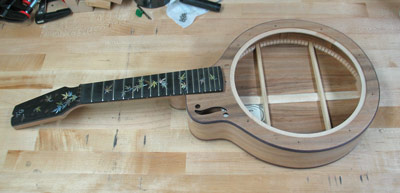
Mandonator™ #9 in the "white." I had it strung up for a "test play," and it sounds as lovely as any Mandonator. Now I'll give it a final sanding and take it to Addam Stark for a lacquer finish.
Mandonator™ 9 has been completed! You can see photos of the finished instrument on its Gallery page.